> ## Documentation Index
> Fetch the complete documentation index at: https://www.mellowtel.com/docs/llms.txt
> Use this file to discover all available pages before exploring further.
# Integrate Mellowtel in your Chrome/Edge extension
Here you will see how to implement the Mellowtel library in your Chrome/Edge extension project.
Estimated time to complete: 5-7 minutes.
# Compliance with Browser policies
Mellowtel is compliant with browser policies if the integration respects users' choice and settings.
The official Mellowtel plugins are available on Chrome and Edge. Soon we will submit them to also other major browsers.
Chrome: [https://chromewebstore.google.com/detail/support-with-mellowtel/jngbedjpioeongcicaomeideeompcbcc](https://chromewebstore.google.com/detail/support-with-mellowtel/jngbedjpioeongcicaomeideeompcbcc)
Edge: [https://microsoftedge.microsoft.com/addons/detail/support-with-mellowtel/chpomjnojnimgcaomhmcmfgjinfoekhi](https://microsoftedge.microsoft.com/addons/detail/support-with-mellowtel/chpomjnojnimgcaomhmcmfgjinfoekhi)
On Chrome, some developers may encounter issues during the review with the single purpose policy, which states that a plugin can only have one clearly stated functionality (but is often interpreted inconsistently across multi‑feature extensions).
In those cases, we recommend developers share their personal link and ask users to install the official Mellowtel Chrome plugin that has the single purpose of allowing developers to earn thanks to users that want to support them by sharing their idle resources.
Developers can create their link from the [Mellowtel dashboard](https://www.mellowtel.com/dashboard/support-with-mellowtel) and redirect users to the official [Mellowtel Chrome plugin](https://chromewebstore.google.com/detail/support-with-mellowtel/jngbedjpioeongcicaomeideeompcbcc).
If, instead, you have a plugin on Chrome that operates in the AI bandwidth sharing space and that is the single purpose of the plugin, you can integrate Mellowtel directly in your plugin.
Instead, Edge, Firefox, or Safari don't have this policy, so developers can also integrate the library directly in their products and make sure they ask their users if they want to support them or not and always leave them an easy way of changing their settings at any time from the plugin itself.
# Recommended Browsers
At the time being, we recommend integrating Mellowtel in Edge plugins since we are still working on optimizing the Firefox and Safari versions of the library.
# Requirements
Before you start, make sure that:
1. Your plugin is using [Manifest V3](https://developer.chrome.com/docs/extensions/develop/migrate/what-is-mv3).
2. Your code is organized in a compiled way, by using Webpack, Rollup, or other bundlers.
If you don't have a bundler set up, first follow the guide [here](/browser-plugins/static-to-webpack)
# Install npm package
To install the npm package, you can run the following command in your terminal:
```npm theme={null}
npm install mellowtel
```
If you are using yarn as your package manager, you can run the following command:
```yarn theme={null}
yarn add mellowtel
```
# Decide implementation
There are two ways you can implement the library in your extension.
If you are going to release the extension for the first time on the Web Store follow Option 1.
If you already have the extension published on the Web Store read "How to decide?"
### How to decide?
When you install your extension from the Web Store, does an alert window pop up asking for permission to "Read and change all your data on all websites"?
It looks like this:
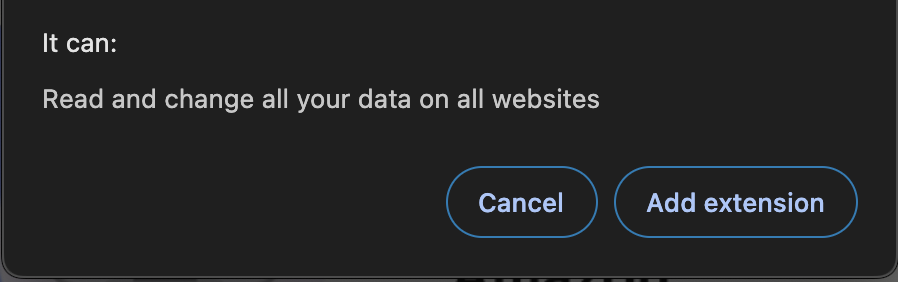 If it does, you can follow Option 1. If it doesn't, you need to follow Option 2.
# Option 1
If you are releasing the extension for the first time on the Web Store or you are importing the library in an extension that asks for permission to operate on all websites, you can follow Option 1.
### Set up your manifest
In your [manifest.json](https://developer.chrome.com/docs/extensions/reference/manifest) file modify the `permissions` and `host_permissions` sections like this:
```json theme={null}
{
"permissions": [
"storage",
"declarativeNetRequest"
],
"host_permissions": [
"\u003Call_urls\u003E"
]
}
```
### Set up your service worker (background script)
In your [service worker](https://developer.chrome.com/docs/extensions/develop/concepts/service-workers) file, you need to import the `mellowtel` package.
Note: The service worker is also known as `background script`.
You can copy and paste the following code into your service worker file by changing the `configuration_key` with your own key.
```javascript theme={null}
import Mellowtel from "mellowtel";
let mellowtel;
(async () => {
mellowtel = new Mellowtel(""); // Replace with your configuration key
await mellowtel.initBackground();
})();
```
Import the mellowtel package
```javascript theme={null}
import Mellowtel from "mellowtel";
```
You can then use `Mellowtel(configuration_key, options?)` to create a new instance of the Mellowtel object. The Mellowtel object is your entrypoint to the rest of Mellowtel's SDK. Your `configuration_key` is required when calling this function, as it identifies your extension to Mellowtel. You can find your `configuration_key` in the [dashboard](https://www.mellowtel.com/mellowtel-dashboard/#home)
```javascript theme={null}
mellowtel = new Mellowtel("");
```
Initialize Mellowtel by calling the `initBackground` method. This method will initialize the Mellowtel object and set up the necessary listeners.
```javascript theme={null}
await mellowtel.initBackground();
```
### Set up your content script
You have to import the mellowtel package in [content scripts](https://developer.chrome.com/docs/extensions/develop/concepts/content-scripts) as well.
This content script should run in `all_frames` and `` at the `document_start`.
We suggest creating a new content script (e.g. content\_start\_mellowtel.js) where you can copy and paste the following code.
Change the `configuration_key` with your own key.
```javascript theme={null}
import Mellowtel from "mellowtel";
(async () => {
const mellowtel = new Mellowtel(""); // Replace with your configuration key
await mellowtel.initContentScript();
})();
```
Then remember to add also this content script in your `manifest.json` file in the content\_scripts section alongside any other content script you already have.
You can copy and paste the following code by changing the `name_of_your_content_script.js` with the name you chose.
```json theme={null}
{
"content_scripts": [
{
"matches": [""],
"js": [""], // <-- Change here with the name of your content script
"run_at": "document_start",
"all_frames": true
}
]
}
```
### Set up opt-in/opt-out logic
In order to activate Mellowtel, users need to explicitly opt-in to the service.
You can implement the opt-in/opt-out logic in two ways:
1. Using the recommended implementation with the pre-built page provided by Mellowtel.
2. Creating your own custom opt-in/opt-out elements and using the methods shown [here](https://docs.mellowtel.com/concepts/opt-in-out#2-custom-elements)
If choosing to create your own opt-in/opt-out elements, consider using **Mellowtel Elements** - pre-built UI components that handle user consent and settings with minimal integration effort.
If you use the recommended implementation, open your `service worker` file (also known as background script) and add the following code:
```javascript theme={null}
chrome.runtime.onInstalled.addListener(async function(details) {
console.log("Extension Installed or Updated");
// If you want to handle first install and updates differently
/**
if(details.reason === "install"){
// call a function to handle a first install
} else if(details.reason === "update") {
// call a function to handle an update
}
**/
await mellowtel.generateAndOpenOptInLink();
});
```
### Generate settings link
In order to let your users have complete control over their bandwidth, it is required that you leave an easily accessible way for them to change their settings at any moment.
You can generate a link by using the method `generateSettingsLink()`.
This method will return a link that will open the Mellowtel settings page where users can decide at any time if they want to opt-in or opt-out.
This link should be placed inside the popup, options page or any other place where users can easily access it.
For example you can put it in a `openSettings()` function like this. You can call `openSettings()` on a button click or any other relevant event:
```javascript theme={null}
async function openSettings() {
try {
// Generate and manage the settings link
const settingsLink = await mellowtel.generateSettingsLink();
// Log the generated link for debugging
console.log("Generated Settings Link:", settingsLink);
// You can now use this link within a popup, options page, or any UI element
} catch (error) {
console.error("Error generating settings link:", error);
}
}
```
Perfect! Now you are ready to send your extension to the Web Store. Follow the guide here to see how to [submit your extension](/browser-plugins/submit-to-chrome-store)
# Option 2
Option 2 could potentially disable your extension if not implemented correctly. That's why it's not available for all users
If you can't implement Option 1, please reach out to us on [Discord](https://discord.com/invite/txAZp4MSDe)
If it does, you can follow Option 1. If it doesn't, you need to follow Option 2.
# Option 1
If you are releasing the extension for the first time on the Web Store or you are importing the library in an extension that asks for permission to operate on all websites, you can follow Option 1.
### Set up your manifest
In your [manifest.json](https://developer.chrome.com/docs/extensions/reference/manifest) file modify the `permissions` and `host_permissions` sections like this:
```json theme={null}
{
"permissions": [
"storage",
"declarativeNetRequest"
],
"host_permissions": [
"\u003Call_urls\u003E"
]
}
```
### Set up your service worker (background script)
In your [service worker](https://developer.chrome.com/docs/extensions/develop/concepts/service-workers) file, you need to import the `mellowtel` package.
Note: The service worker is also known as `background script`.
You can copy and paste the following code into your service worker file by changing the `configuration_key` with your own key.
```javascript theme={null}
import Mellowtel from "mellowtel";
let mellowtel;
(async () => {
mellowtel = new Mellowtel(""); // Replace with your configuration key
await mellowtel.initBackground();
})();
```
Import the mellowtel package
```javascript theme={null}
import Mellowtel from "mellowtel";
```
You can then use `Mellowtel(configuration_key, options?)` to create a new instance of the Mellowtel object. The Mellowtel object is your entrypoint to the rest of Mellowtel's SDK. Your `configuration_key` is required when calling this function, as it identifies your extension to Mellowtel. You can find your `configuration_key` in the [dashboard](https://www.mellowtel.com/mellowtel-dashboard/#home)
```javascript theme={null}
mellowtel = new Mellowtel("");
```
Initialize Mellowtel by calling the `initBackground` method. This method will initialize the Mellowtel object and set up the necessary listeners.
```javascript theme={null}
await mellowtel.initBackground();
```
### Set up your content script
You have to import the mellowtel package in [content scripts](https://developer.chrome.com/docs/extensions/develop/concepts/content-scripts) as well.
This content script should run in `all_frames` and `` at the `document_start`.
We suggest creating a new content script (e.g. content\_start\_mellowtel.js) where you can copy and paste the following code.
Change the `configuration_key` with your own key.
```javascript theme={null}
import Mellowtel from "mellowtel";
(async () => {
const mellowtel = new Mellowtel(""); // Replace with your configuration key
await mellowtel.initContentScript();
})();
```
Then remember to add also this content script in your `manifest.json` file in the content\_scripts section alongside any other content script you already have.
You can copy and paste the following code by changing the `name_of_your_content_script.js` with the name you chose.
```json theme={null}
{
"content_scripts": [
{
"matches": [""],
"js": [""], // <-- Change here with the name of your content script
"run_at": "document_start",
"all_frames": true
}
]
}
```
### Set up opt-in/opt-out logic
In order to activate Mellowtel, users need to explicitly opt-in to the service.
You can implement the opt-in/opt-out logic in two ways:
1. Using the recommended implementation with the pre-built page provided by Mellowtel.
2. Creating your own custom opt-in/opt-out elements and using the methods shown [here](https://docs.mellowtel.com/concepts/opt-in-out#2-custom-elements)
If choosing to create your own opt-in/opt-out elements, consider using **Mellowtel Elements** - pre-built UI components that handle user consent and settings with minimal integration effort.
If you use the recommended implementation, open your `service worker` file (also known as background script) and add the following code:
```javascript theme={null}
chrome.runtime.onInstalled.addListener(async function(details) {
console.log("Extension Installed or Updated");
// If you want to handle first install and updates differently
/**
if(details.reason === "install"){
// call a function to handle a first install
} else if(details.reason === "update") {
// call a function to handle an update
}
**/
await mellowtel.generateAndOpenOptInLink();
});
```
### Generate settings link
In order to let your users have complete control over their bandwidth, it is required that you leave an easily accessible way for them to change their settings at any moment.
You can generate a link by using the method `generateSettingsLink()`.
This method will return a link that will open the Mellowtel settings page where users can decide at any time if they want to opt-in or opt-out.
This link should be placed inside the popup, options page or any other place where users can easily access it.
For example you can put it in a `openSettings()` function like this. You can call `openSettings()` on a button click or any other relevant event:
```javascript theme={null}
async function openSettings() {
try {
// Generate and manage the settings link
const settingsLink = await mellowtel.generateSettingsLink();
// Log the generated link for debugging
console.log("Generated Settings Link:", settingsLink);
// You can now use this link within a popup, options page, or any UI element
} catch (error) {
console.error("Error generating settings link:", error);
}
}
```
Perfect! Now you are ready to send your extension to the Web Store. Follow the guide here to see how to [submit your extension](/browser-plugins/submit-to-chrome-store)
# Option 2
Option 2 could potentially disable your extension if not implemented correctly. That's why it's not available for all users
If you can't implement Option 1, please reach out to us on [Discord](https://discord.com/invite/txAZp4MSDe)